Welcome Message

Blog Consits of a Blogger Hacks and Blogger Templates.Enhace your blog with a excellent blogger templates and very good blogger hacks.

News Blog blogger template

0

Posted on : 2:29 PM | By : sriram | In :

Download Now
This template is a normal template of 3 columns.Mainly this template is used by the news site because it is plain theme with 3 columns. As template is seo friendly template for blogger.
To Download best blogger templates.......
Best Blogger Templates

Excellence Blogger Template

0

Posted on : 2:20 PM | By : sriram | In :

Download Now
The 3 column Blogger template ,Which is a web 2.0 template, which is converted in to the premium blogger template.
This template consists of 125*125 ads section,Tabbed view bar at the side and seo friendly template.
This is a famous ads friendly template.
To Download best blogger templates.......
Best Blogger Templates

Red Tweet Template

0

Posted on : 2:09 PM | By : sriram | In : ,


Download Now
This is a Red tweet template which is a wordpress template,converted in to blogger template for you to download this premium templates for free.
To Download best blogger templates.......
Best Blogger Templates

Retweet Button To Blogger

0

Posted on : 12:44 PM | By : sriram | In :

Tweetmeme gives you two types of buttons,

* A button, which looks somewhat alike the Digg button


* A Compact version which fits in less space


1.Login to your blogger account using your id
2.In your dashboard click layout
3.In the layout click Edit Html in the tab bar
4.In the click Expand Widget.You may need to backup you template
5.In your template Use CTRL + F to open search,


<p><data:post.body/></p>

And add the below code like as below:-


<p><data:post.body/>
<div style='float:right; margin-left:10px;'>
<script type="text/javascript">
tweetmeme_url = '<data:post.url/>';
</script>
<script type="text/javascript" src="http://tweetmeme.com/i/scripts/button.js"> </script>
</div>
</p>


This will add retweet button to your right of blogger post at beggining,if dont find the code enclosed in </p> Add above codes after it <data:post.body/> this will add this retweet button at end of the post.

Add below codes after this <data:post.body/> code to place button at end of post.


<script type="text/javascript">
tweetmeme_url = '<data:post.url/>';
</script>
<script type="text/javascript" src="http://tweetmeme.com/i/scripts/button.js"> </script>


If you wanna use compact button code use below one.


<script type="text/javascript">
tweetmeme_style = "compact";
</script>
<script type="text/javascript" src="http://tweetmeme.com/i/scripts/button.js"></script>


Save your template and done.

How To Add digg button in blogger

0

Posted on : 12:07 PM | By : sriram | In :

Adding digg button in blogger is very simple,just do this small edit in your blog Template
1.Login to your blogger account using your id
2.In your dashboard click layout
3.In the layout click Edit Html in the tab bar
4.In the click Expand Widget.You may need to backup you template
5.In your template Use CTRL + F to open search,( many people don't know this).Search fro this code
<p><data:post.body/></p

Due to template differences,you may not find above code, then search for this
<data:post.body/>
6.Paste this on the line directly before it:
<div style='float:right; margin-left:10px;'><script type='text/javascript'>digg_url=&quot;<data:post.url/>&quot;;</script><script src='http://digg.com/tools/diggthis.js' type='text/javascript'/></div>

Save your template.The digg button will then be located on right top of every of your Post

Download links

0

Posted on : 9:04 AM | By : sriram

This is the that contains download links and free download links of rapidshare,hot file,uploading,deposit files and etc.,
This site just for the members who join in this website,no body can acces the links of this site with out registration of this site.
http://13down.co.cc
does not store any files on its server and the links are provided by other sites.

in reference to: Download links (view on Google Sidewiki)

176 Directories submit your blog

0

Posted on : 9:49 AM | By : sriram | In :

This summary is not available. Please click here to view the post.

Multi-Level Drop-Down Menu

0

Posted on : 9:16 AM | By : sriram | In : , ,


STEP #1:


Log in to Blogger, go to Layout and click on "Edit HTML"


Find (CTRL+F) this code in the template:

</head>
and immediately ABOVE / BEFORE that, paste this code:

<!--MULTI-LEVEL-DD-MENU-STARTS-->


<link rel="stylesheet" href="http://files.main.bloggerstop.net/uploads/3/0/2/5/3025338/style.css" type="text/css" />

<script type="text/javascript" src="http://files.main.bloggerstop.net/uploads/3/0/2/5/3025338/script.js"></script>

<!--MULTI-LEVEL-DD-MENU-http://www.hackblogger.co.cc/-->


STEP #2:

Now go to "Layout" -> "Edit HTML" -> "Page Elements" and click on "Add a Gadget" and select it as "HTML/JavaScript" type.


And add this code to it:

<!--MULTI-LEVEL-DD-MENU-STARTS-->

<ul class="menunew" id="menu">

<li><a href="#" class="menulink">Dropdown One</a>

<ul>

<li><a href="#">Navigation Item 1</a></li>


<li>

<a href="#" class="sub">Navigation Item 2</a>

<ul>

<li class="topline"><a href="#">Navigation Item 1</a></li>

<li><a href="#">Navigation Item 2</a></li>


<li><a href="#">Navigation Item 3</a></li>

<li><a href="#">Navigation Item 4</a></li>

<li><a href="#">Navigation Item 5</a></li>


</ul>

</li>

<li>

<a href="#" class="sub">Navigation Item 3</a>

<ul>

<li class="topline"><a href="#">Navigation Item 1</a></li>


<li><a href="#">Navigation Item 2</a></li>

<li>

<a href="#" class="sub">Navigation Item 3</a>

<ul>

<li class="topline"><a href="#">Navigation Item 1</a></li>


<li><a href="#">Navigation Item 2</a></li>

<li><a href="#">Navigation Item 3</a></li>

<li><a href="#">Navigation Item 4</a></li>


<li><a href="#">Navigation Item 5</a></li>

<li><a href="#">Navigation Item 6</a></li>

</ul>

</li>

<li><a href="#">Navigation Item 4</a></li>


</ul>

</li>

<li><a href="#">Navigation Item 4</a></li>

<li><a href="#">Navigation Item 5</a></li>

</ul>


</li>

<li><a href="http://www.hackblogger.co.cc/" class="menulink">Blogger Help</a></li>

<li>

<a href="#" class="menulink">Dropdown Two</a>

<ul>

<li><a href="#">Navigation Item 1</a></li>


<li>

<a href="#" class="sub">Navigation Item 2</a>

<ul>

<li class="topline"><a href="#">Navigation Item 1</a></li>

<li><a href="#">Navigation Item 2</a></li>


<li><a href="#">Navigation Item 3</a></li>

</ul>

</li>

</ul>

</li>

<li>

<a href="#" class="menulink">Dropdown Three</a>


<ul>

<li><a href="#">Navigation Item 1</a></li>

<li><a href="#">Navigation Item 2</a></li>

<li><a href="#">Navigation Item 3</a></li>


<li><a href="#">Navigation Item 4</a></li>

<li><a href="#">Navigation Item 5</a></li>

<li>

<a href="#" class="sub">Navigation Item 6</a>


<ul>

<li class="topline"><a href="#">Navigation Item 1</a></li>

<li><a href="#">Navigation Item 2</a></li>

</ul>

</li>


<li><a href="#">Navigation Item 7</a></li>

<li><a href="#">Navigation Item 8</a></li>

<li><a href="#">Navigation Item 9</a></li>


<li><a href="#">Navigation Item 10</a></li>

</ul>

</li>

</ul>

<script type="text/javascript">

var menu=new menu.dd("menu");

menu.init("menu","menuhover");


</script>

<!--MULTI-LEVEL-DD-MENU-http://www.hackblogger.co.cc/-->
Of course you have to edit the content before saving this widget.


NOTE: Although the required css and js files are already uploaded and linked in the code in ,but I suggest you to download and save these files as a backup on your PC:

Download these 2 files:
DDM1_script.js, and
DDM1_style.css

Download Link

Recent Posts In Blogger

0

Posted on : 9:04 AM | By : sriram | In :

Log in to Blogger, go to Layout and click on "Add a Gadget", and select it as "HTML/JavaScript type".
Now add this code in to the widget:

<script>

function rp(json) {

document.write('<ul>');


for (var i = 0; i < numposts; i++) {

document.write('<li>');


var entry = json.feed.entry[i];

var posttitle = entry.title.$t;

var posturl;


if (i == json.feed.entry.length) break;


for (var k = 0; k < entry.link.length; k++) {

if (entry.link[k].rel == 'alternate') {

posturl = entry.link[k].href;


break;

}

}


posttitle = posttitle.link(posturl);

var readmorelink = "(more)";

readmorelink = readmorelink.link(posturl);

var postdate = entry.published.$t;


var cdyear = postdate.substring(0,4);

var cdmonth = postdate.substring(5,7);

var cdday = postdate.substring(8,10);

var monthnames = new Array();

monthnames[1] = "Jan";

monthnames[2] = "Feb";

monthnames[3] = "Mar";


monthnames[4] = "Apr";

monthnames[5] = "May";

monthnames[6] = "Jun";

monthnames[7] = "Jul";

monthnames[8] = "Aug";


monthnames[9] = "Sep";

monthnames[10] = "Oct";

monthnames[11] = "Nov";

monthnames[12] = "Dec";


if ("content" in entry) {

var postcontent = entry.content.$t;

} else if ("summary" in entry) {

var postcontent = entry.summary.$t;

} else

var postcontent = "";


var re = /<\S[^>]*>/g;

postcontent = postcontent.replace(re, "");

document.write(posttitle);


if (showpostdate == true) document.write(' - ' + monthnames[parseInt(cdmonth,10)] + ' ' + cdday);


if (showpostsummary == true) {

if (postcontent.length < numchars) {


document.write(postcontent);

} else {

postcontent = postcontent.substring(0, numchars);

var quoteEnd = postcontent.lastIndexOf(" ");

postcontent = postcontent.substring(0,quoteEnd);

document.write(postcontent + '...' + readmorelink);

}

}


document.write('</li>');

}

document.write('</ul>');


}

</script>


<script>


var numposts = 7;

var showpostdate = false;

var showpostsummary = false;

var numchars = 100;


</script>


<script src="http://YOUR_BLOG.BLOGSPOT.COM/feeds/posts/default?orderby=published&alt=json-in-script&callback=rp"></script><br/><span style="font-size: x-small;"><a href="http://bloggerstop.net">Blogger Widgets</a></span>


The code in blue is what you have to change (replace the entire code in blue with your blog's address)
And the code in red, is optional to change.

Popular Posts Widget For Blogger

0

Posted on : 8:58 AM | By : sriram | In : ,

Log in to Blogger
Go to Layout -> Add a Gadget -> HTML/JavaScript

Now copy and paste this code in to the widget:

Widget Style #1

<script type="text/javascript">

function pipeCallback(obj) {

document.write('<ul style="text-transform: capitalize;">');

var i;

for (i = 0; i < obj.count ; i++)

{


var href = "'" + obj.value.items[i].link + "'";

var item = "<li>" + "<a href=" + href + ">" + obj.value.items[i].title + "</a> </li>";

document.write(item);

}

document.write('</ul>');


}

</script>

<script src="http://pipes.yahoo.com/pipes/pipe.run?_render=json&_callback=pipeCallback&_id=28a6afad7c6ba1288c1b738277e42385&url=http%3A%2F%2FYOUR_BLOG_ADDRESS_HERE_WITHOUT_http://&num=10" type="text/javascript"></script>

<a href="http://www.hackblogger.co.cc/" target="_blank"><span style="font-size: xx-small;">Popular Posts Widget</span></a>


Replace Red Code with your blog address.
The above code displays 10 posts, you can change it by editing the number being displayed in blue !

Create a Expandable Content script for Blogger

0

Posted on : 9:41 AM | By : sriram | In : ,

Before start of the please kindly save your template.

After you goto your blog edit Html Page , copy the following CSS code and Paste it to the head section of your Template just before . This CSS code is Provided for two Templates. Minima and Denim. If you are Using Minima Template then Copy the Minima Code or If you are Using Denim Template then Copy the Denim Code and Paste just before ]]></b:skin>.

Denim Code

/* Expandable Content CSS Code for Denim Template
----------------------------------------------- */

.expandtitle{
background-color:$sidebarTitleBgColor;
color:$sidebarTitleTextColor;
padding-left:5px;
}

.expandcontent{
background-color: $mainBgColor;
color: $textColor;
}

Minima Code
/* Expandable Content CSS Code for Minima Template
----------------------------------------------- */

.expandtitle{
background-color:$sidebarbgcolor;
color:$sidebarcolor;
padding-left:5px;
}

.expandcontent{
background-color: $sidebarbgcolor;
color:$sidebartextcolor;
}

The purpose of using above CSS code is to match color of expandable content and you blog color.You can use your own choice color also. To use your own choice color replace the above color with your liked color code.

Copy the following JavaScript code paste it just after ]]></b:skin> in your Template.

<!-- flooble Expandable Content header start -->
<script language="javascript">

// Expandable content script from flooble.com
// Promoted by bloganol.blogspot.com
// For more information please visit:
// http://www.flooble.com/scripts/expand.php
// Copyright 2002 Animus Pactum Consulting Inc.
//----------------------------------------------
var ie4 = false; if(document.all) { ie4 = true; }
function getObject(id) { if (ie4) { return document.all[id]; } else {
return document.getElementById(id); } }
function toggle(link, divId) { var lText = link.innerHTML; var d =
getObject(divId);
if (lText == '+') { link.innerHTML = '−'; d.style.display = 'block'; }
else { link.innerHTML = '+'; d.style.display = 'none'; } }
</script>
<!-- flooble Expandable Content header end -->
This is the most important code of this hack . If do do a simple mistake in the above code the whole hack will fail . So please copy this code as it is .

Now Paste the following code to your blog By adding a new Html Page from your blog Layout Page.

<div class="expandtitle">
<table border="0" cellspacing="0" cellpadding="2" width="100%">
<tr><td> Title Here </td><td

align="right"></div>


[<a title="show/hide" id="exp1209796610_link" href="javascript:
void(0);" onclick="toggle(this, 'exp1209796610');">&#8722;</a>]</td></tr></table></div>

<div id="exp1209796610" style="padding: 3px;" class="expandcontent">

Your Content Here.

</div>
</td></tr></table>

See the above code clearly and replace Title here with your Content Title and Replace Your Content here with your Content.

Now two options come for you to make your expandable content Initially visible or Initially Hidden . If you like to display your expandable content Initially Hidden then paste the following code with the code from Step 3 or if you like to display it initially visible then Skip this step.

<script language="javascript">toggle(getObject('exp1209796610_link'),
'exp1209796610');</script>


Save your Template. Oh! one thing I forgot to say that if you like to create more than one expandable content in your blog then you should not have to perform this hack from step 1 again and again . Once you Install this hack in your blog from next time you can create other expandable content by customizing the code from step 3 and Pasting it to your blog.

By using this hack you can add as much page Elements in your blog as you like beside this your blog will also look more clear and attractive. I hope you enjoy this hack and will enjoy more using it. If you like this post or Problem with this post then please Leave us a comment on this post. Or if you like to promote this post then please Link to this post in your blog.

Remove "Newer Posts" and "Older Posts" Links

0

Posted on : 9:36 AM | By : sriram | In : ,

It is very easy to remove "Newer Posts" and "Older Posts" Link from the footer of your blog Post . You are actually hiding it which can be rolled back by reversing this hack. Now lets start removing this link from your blog.

Search for the following Code in your Template.


#blog-pager-newer-link {
float: left;
}

#blog-pager-older-link {
float: right;
}

#blog-pager {
text-align: center;
}
Now replace the above code with this code.
#blog-pager-newer-link {
float: left;
display: none;
}

#blog-pager-older-link {
float: right;
display: none;
}

#blog-pager {
text-align: center;
display: none;
}
If you like to rollback this and want to show "Newer Posts" and "Older posts" Link then reverse this Process.

Arto Blogger Theme

0

Posted on : 7:01 AM | By : sriram | In :


HACKBLOGGER Provides a Ultimate Blogging Themes

download now:
http://rapidshare.com/files/319858136/HACKBLOGGER_Arto.zip

Fixed Side Menu For Blogger

0

Posted on : 1:18 AM | By : sriram


Fixed side menu for blogger blogspot or some says it as fixed slide in menu for blogger as was seen only in wordpress but now can be used in bloggers also.As you could see it in my blog i have side menu that moves together with you scroll movement up and down on my blog.I am sharing this with you because many of my readers were asking how to make it as they liked it much and wanted to add it to there blogs so if you liked side menu in my blog you can go further to install it in your blog too.

First Download this zip file and you will get these two files to your computer.
ssm.js
ssmItems.js

Now open the ssmItems.js file in notepad
After opening it in notepad you will see the codes like written below.


<!--

/*
Configure menu styles below
NOTE: To edit the link colors, go to the STYLE tags and edit the ssm2Items colors
*/
YOffset=150; // no quotes!!
XOffset=0;
staticYOffset=30; // no quotes!!
slideSpeed=20 // no quotes!!
waitTime=100; // no quotes!! this sets the time the menu stays out for after the mouse goes off it.
menuBGColor="black";
menuIsStatic="yes"; //this sets whether menu should stay static on the screen
menuWidth=150; // Must be a multiple of 10! no quotes!!
menuCols=2;
hdrFontFamily="verdana";
hdrFontSize="2";
hdrFontColor="white";
hdrBGColor="#170088";
hdrAlign="left";
hdrVAlign="center";
hdrHeight="15";
linkFontFamily="Verdana";
linkFontSize="2";
linkBGColor="white";
linkOverBGColor="#FFFF99";
linkTarget="_top";
linkAlign="Left";
barBGColor="#444444";
barFontFamily="Verdana";
barFontSize="2";
barFontColor="white";
barVAlign="center";
barWidth=20; // no quotes!!
barText="SIDE MENU"; // <IMG> tag supported. Put exact html for an image to show.

///////////////////////////

// ssmItems[...]=[name, link, target, colspan, endrow?] - leave 'link' and 'target' blank to make a header
ssmItems[0]=["MENU"] //create header
ssmItems[1]=["Home", "http://anshuldudeja.blogspot.com", ""]
ssmItems[2]=["Blogger Widgets", "http://anshuldudeja.blogspot.com/search/label/Blogger%20Widget",""]
ssmItems[3]=["Blogger Hacks", "http:///anshuldudeja.blogspot.com/search/label/Blogger%20Hack", ""]
ssmItems[4]=["Blogger Tutorials", "http://anshuldudeja.blogspot.com/search/label/Blogger%20Tutorial", "_new"]
ssmItems[5]=["Blogger Templates", "http://anshuldudeja.blogspot.com/search/label/Blogger%20Templates", ""]
ssmItems[6]=["Contact", "http://anshuldudeja.blogspot.com/2008/11/contact-us.html", ""]

ssmItems[7]=["FAQ", "#nogo", "", 1, "no"] //create two column row
ssmItems[8]=["Email", "#nogo", "",1]

ssmItems[9]=["External Links", "", ""] //create header
ssmItems[10]=["Online Jobs", "http://earnwithbloggers.blogspot.com", ""]
ssmItems[11]=["Funny Blog", "http://funny-concepts.blogspot.com", ""]
ssmItems[12]=["Earn Money", "http://ezinfocenter.com/10142921/CB", ""]

buildMenu();

//-->


Now just edit the the links in red in codes to place your own link which you want to display and text in blue which you want to show up the title for that link.

After editing all these links just save the file.

Now upload both files ssm.js and ssmItems.js to your own server like on geocities or sigmirror dot com,don't use mine as will not work due to exceeded bandwidth.

Now GO To LAYOUT > EDIT HTML
and find the </head> tag and place the below codes before it.


<style type="text/css">
<!--
A.ssmItems:link {color:black;text-decoration:none;}
A.ssmItems:hover {color:black;text-decoration:none;}
A.ssmItems:active {color:black;text-decoration:none;}
A.ssmItems:visited {color:black;text-decoration:none;}
//-->
</style>


<SCRIPT SRC="http://www.geocities.com/anshrailoves/ssm.js" language="JavaScript1.2">
//Dynamic-FX slide in menu v6.5 (By maXimus, http://maximus.ravecore.com/)
//Updated July 8th, 03' for doctype bug
//For full source, and 100's more DHTML scripts, visit http://www.dynamicdrive.com
</SCRIPT>
<SCRIPT SRC="http://www.geocities.com/anshrailoves/ssmItems.js" language="JavaScript1.2"></SCRIPT>


And don't forget to change the links in red above with the links of yours where your ssm.js and ssmItems.js file are uploaded to your own server.

And now SAVE It

Add Your Site

0

Posted on : 12:30 AM | By : sriram | In : ,

So I have changed my blog settings in the template ,so if you want backlink the comment in my blog ,commenting in my blog will u get the back link to your blog ,commenting the blogs will increase the pagerank of your blog

Blogger Widgets

0

Posted on : 11:26 PM | By : sriram | In :

Blogger is a great free blog platform that is improving every day. New useful hacks and widgets are being created on a regular basis. Here is a list of some of the very best blogger widgets and blogger hacks that will improve the usability of your blog.

Related Posts Widget:
Display related posts beneath each of your blog posts. Links are displayed based on labels given to each post.

Display a simple tag cloud in your blog's sidebar. The tags are displayed based upon the labels given to each post.

Are you tired of the regular organge favicon provided by blogger? This tutorial will teach you how to display your own customized favicon.


Peel over page effect Hack Blogger

This is the widget used for professional websites that it will peel at the corner,just use the widget in your blog.

Post Rating Widget for Blogger:
This is the Rating Widget used for the Blog,Many Bloggers use add this widget

Read more in blogger:
This is the Widget used for blogger post for show some description at the home page ,and then shows full post.

How to add social bookmarking icons in blogger:
Social Bookmark Links are widely used by bloggers to help their readers share the useful contents to the world! Digg, Technorati, Delicious, Stumble Upon, Facebook etc are widely used online social bookmarking and sharing communities.

Fixed Side Menu For Blogger:
Fixed side menu for blogger blogspot or some says it as fixed slide in menu for blogger as was seen only in wordpress but now can be used in bloggers also.As you could see it in my blog i have side menu that moves together with you scroll movement up and down on my blog.

Add Your Signature to your every post:

Add your signature to your every post and get a proffessional look for your blogger blog.


Add Buzz button to blogger
Now just Go to this link there you will find the yahoo buzz buttons.Choose your button there.Now...(more)

Add Sphinn it To Blogger

Go To Edit HTML section and click the “Expand Widget Templates” check box.Now press Crt+F and...(more)

Add Mixx It Button To Blogger
Log in to Blogger Layout----------> Edit Html-------> Expand Widget Templates.Find this line of...(more

Add facebook button to blogger
Go to blogger dashboard -Edit HTML -Check Expand Widget - and find the code below

Add orkut Button To Blogger
Login to your Blogger dashboard Go to Layout

Recent Posts In Blogger

Log in to Blogger, go to Layout and click on "Add a Gadget", and select it as "HTML/JavaScript type"......


Remove Newer Posts and Older posts

It is very easy to remove "Newer Posts" and "Older Posts" Link from the footer of your blog Post . You are actually hiding it which can be rolled back by reversing this hack.....


Add Design Float to Blogger

This tutorial
explains how to add a
Float it! button on each post on your Blogger template....


Add Retweet Button To Blogger

1.Login to your blogger account using your id
2.In your dashboard click layout
3.In the layout click Edit Html in the tab bar
.....

Related Posts Widget for Blogger / Blogspot

1

Posted on : 10:47 PM | By : sriram | In :

Steps for Implementation:

  1. Go to Layout >Edit HTML in your Blogger Dashboard.
  2. Back up your existing Template before making any changes!
  3. Make sure to check the "Expand Widget Templates" box.
  4. Search for the </head> tag.
  5. Add the following code just before the </head> tag.
  6. <style>
    #related-posts {
    float : left;
    width : 540px;
    margin-top:20px;
    margin-left : 5px;
    margin-bottom:20px;
    font : 11px Verdana;
    margin-bottom:10px;
    }
    #related-posts .widget {
    list-style-type : none;
    margin : 5px 0 5px 0;
    padding : 0;
    }
    #related-posts .widget h2, #related-posts h2 {
    font-size : 20px;
    font-weight : normal;
    margin : 5px 7px 0;
    padding : 0 0 5px;
    }
    #related-posts a {
    text-decoration : none;
    }
    #related-posts a:hover {
    text-decoration : none;
    }
    #related-posts ul {
    border : medium none;
    margin : 10px;
    padding : 0;
    }
    #related-posts ul li {
    display : block;
    background : url("https://blogger.googleusercontent.com/img/b/R29vZ2xl/AVvXsEhFGQy228ysnepXbxW82WrGsRIpX847-LKmjwK18r5wsIgGSfLgHFHV7wqn-dt8PzPkFu5K4v0fFpo-KYCJMc4qzdNb843cyhWaYzVzvXOpwXyPNCvKn8z8zz_aks6B6SxgoZ071tJ2hnw/") no-repeat 0 0;
    margin : 0;
    padding-top : 0;
    padding-right : 0;
    padding-bottom : 1px;
    padding-left : 21px;
    margin-bottom : 5px;
    line-height : 2em;
    border-bottom:1px dotted #cccccc;
    }
    </style>
    <script src='http://bsaves.com/scripts/Related_posts_hack.js' type='text/javascript'/>
  7. Now search for <p><data:post.body/></p>. In some of the templates this code may look like this
    <div class='post-body>
    or
    <p><data:post.body/></p>

  8. Add the following code just beneath the code you just searched for.
    <b:if cond='data:blog.pageType == "item"'>
    <div id="related-posts">
    <font face='Arial' size='3'><b>Related Posts : </b></font><font color='#FFFFFF'><b:loop values='data:post.labels' var='label'><data:label.name/><b:if cond='data:label.isLast != &quot;true&quot;'>,</b:if><b:if cond='data:blog.pageType == &quot;item&quot;'>
    <script expr:src='&quot;/feeds/posts/default/-/&quot; + data:label.name + &quot;?alt=json-in-script&amp;callback=related_results_labels&amp;max-results=5&quot;' type='text/javascript'/></b:if></b:loop> </font>
    <script type='text/javascript'> removeRelatedDuplicates(); printRelatedLabels();
    </script>
    </div></b:if>
  9. Now Save your Template and you're done!
Customization
  • In order to change the number of maximum related posts being displayed for each label, search for the code below (within the code given in step 7) and change the number "5" to any desired number.
  • max-results=5

If you have any questions on implementing this hack into your own blog

About Me

0

Posted on : 8:54 PM | By : sriram

Hack Blogger is a resource blog for bloggers, offering hints, hacks, tips and tricks to help enhance your blogging experience. Use the label cloud and search box in the right hand sidebar of you're looking for specific information, or simply browse through my posts instead. Since I was asked so many questions about the customizations on my other blog, I decided to create a blog which focuses on these sorts of questions. As I learn more about blogging, I'll share my knowledge here, and post instructions which are easy to understand. If there are any specific questions you would like to be answered here, please leave your comments or contact me directly.

Create navigation buttons to enhance your blog

0

Posted on : 2:33 PM | By : sriram | In :

Many blogs and websites feature "navigation button" links like a menu at the top of the page or beneath the header. This can be really helpful for readers to navigate to areas of interest in your blog, such as the home page, about page and contact links.

In this tutorial, I'll explain a very simple (but effective) method of creating such a "navigation buttons" for your own blog, which you can use to add easily accessible links to your post pages.

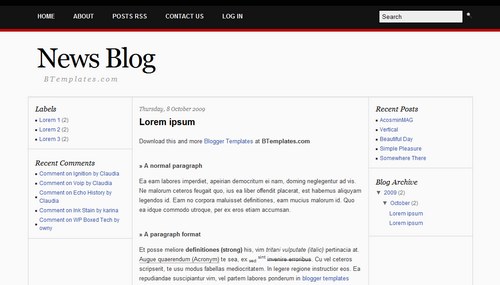
Here is an example of the buttons you can create using this tutorial (though the links in these buttons all point back to this page!):

HomeAboutContact


To create these buttons for your blog, we don't need to use any external images! With a little CSS styling, you can easily create navigation buttons which change color when your mouse hovers over them, making it easier to see that these are indeed clickable links. This style of button is helpful to your visitors and invites them to view the important pages you link to using these links.

There are two main steps to creating these buttons for your blog:

  1. Add some styling code to your blog's template

  2. Create a new HTML/Javascript widget, and create your links

You can use these links anywhere in your blog that you are able to place an HTML/Javascript widget, such as your sidebar, the header section, or above your blog posts.

Here are the steps in detail:

Add some code to the style section of your blog template

The "style" section of "layouts" blogs is contained between the <b:skin> and </b:skin> tags in your template. The simplest way to add extra styling code is to place this just after the closing </b:skin> tag (key CTRL+F to easily find this in your template).

The styling code used for the buttons featured above is as follows:

a.navigation {

background: #000000;

color: #ffffff;

margin: 1px;

padding: 5px 35px 5px 5px;

border-width: 0;

text-transform: uppercase;

text-decoration: none;

font-weight: bold;

}

a.navigation:hover {

background: #5d5d54;

text-decoration: none;

}

If you copy and paste this code just before the closing </b:skin> tag in your blog template, you will easily be able to create your navigation buttons. If you prefer, you can change the color of the backgrounds (highlighted in red) to colors which better suit your blog. You can easily find the hex values for the colors you need by using the Color Calculator in the tools section of this site.

You will notice that there are two statements in this styling: the first defines what the buttons will look like as they appear in your blog, while the second (hover) statement defines the background color of the button when you place your cursor over the button (the "mouseover" effect).

Create your links in an HTML/Javascript widget

Once you have added this style code to your template, you should save your template and go to the layouts section of your blog (Template>Layout). Here you should create a new HTML/Javascript widget where you would like your buttons to appear.

In this new widget, you should add your links in the following format:

<a class="navigation" href="http://your-link-url.blogspot.com">Your link</a>
<a class="navigation" href="http://your-link-url.blogspot.com">Your second link</a>
<a class="navigation" href="http://your-link-url.blogspot.com">Your third link</a>

Be sure to replace "http://your-link-url.blogspot.com" with the URL of the post page (or link) you would like the button to link to, and replace the link text (eg: Your Link) with the text you would like to display.

Once you have created your links (you can add as few or as many as you like), save your HTML/Javascript widget, and take a look at the effect in your blog.

How this works

The styling code we add to the template creates styling rules for "anchor links" which are given the class of "navigation". We can use different "classes" to create different effects for elements which appear in your blog layout; the class we give for the navigation links does not affect other links in your template, only those which have the class of "navigation".

With a few tweaks, you can change the style of these buttons to completely blend with the overall appearance of your blog template, and create attractive clickable buttons to your important pages which your visitors will love

Tip To Increase Page Rank

0

Posted on : 2:04 PM | By : sriram | In :

.

Increase Your Blog's Technorati Backlinks Anyone?

0

Posted on : 1:40 PM | By : sriram

Does Anyone want to increase their number of backlinks on Technorati? If so, then join the movement on MoneyBush™ and watch your blog grow with us.
Here are the Rules:
Copy the official list into a blog post of yours.
Add your link to the bottom of the list.
Comment HERE so that we can update the list with your link. Make sure to provide the URL of your new blog post.
Watch the backlinks to your blog increase dramatically via Technorati.
The sooner you join, the more backlinks you will recieve.

Label Cloud in your blog - A blogger Hack

0

Posted on : 10:57 AM | By : sriram | In : ,

To Put Label cloud or tag

cloud on yours blogger sidebar template you have to follow below
instruction carefully and with free mind
:)
This hack will really add flavour to your blogger Template and help
yours readers in finding contents according to label or tags ,this
features will really make you free to add many tags according to your
blog post.
Make sure you backup your template before making any changes!

  • Log in to your Blogger account

  • On yours Dashboard Select Layout


  • Note-You have a Label widget already Installed In your blogspot webpage where you want it (it can be moved around later)


  • Go To Edit Html


  • Then Search for the code ]]></b:skin> And Place Below Code In place of ]]></b:skin>(By Removing ]]></b:skin>)

  • Click Here To Get The Code :)

  • Now Save Template and Search for below mention label widget in blogger Html

  • <b:widget id=’Label1′ locked=’false’ title=’Labels’ type=’Label’/>


  • Atlast replace the above mention Label1 widget code with below code


  • Click Here To Get The Code :)


    And you are Done :) ,In Case Of Any problem fell free to post yours problems in Comment

Peel over page effect Hack Blogger

0

Posted on : 10:50 AM | By : sriram | In :

You may have before seen a peel over effect on some proffessional website and not knew how to get that on your blog this post will help you get that on your Blog

you may use it to shoe advts ,rss feeds or whaterer you want and link it too


Here is the hack to do so..

just follow the steps they are short and sweet

Just login to Blogger,

Go To Layout > Edit Html > Press Ctrl + F[find]

</head>

Now place these codes above it


<style type='text/css'>

img { behavior: url(iepngfix.htc) }

#pageflip {

position: relative;

right: 0; top: 0;

float: right;

}

#pageflip img {

width: 50px; height: 52px;

z-index: 99;

position: absolute;

right: 0; top: 0;

-ms-interpolation-mode: bicubic;

}

#pageflip .msg_block {

width: 50px; height: 50px;

overflow: hidden;

position: absolute;

right: 0; top: 0;

background: url(http://www.astro.wisc.edu/~townsend/resource/news/rss.jpg) no-repeat right top;

}

</style>


<script src='http://code.jquery.com/jquery-latest.js' type='text/javascript'/>

<script type='text/javascript'>

$(document).ready(function(){


//Page Flip on hover


$("#pageflip").hover(function() {

$("#pageflip img , .msg_block").stop()

.animate({

width: '307px',

height: '319px'

}, 500);

} , function() {

$("#pageflip img").stop()

.animate({

width: '50px',

height: '52px'

}, 220);

$(".msg_block").stop()

.animate({

width: '50px',

height: '50px'

}, 200);

});


});

</script>


Red line is the image you want to show

Now search for


<body>

place the following code after it


<div id='pageflip'>

<a

href='http://feeds2.feedburner.com/btips'><img alt=''

src='http://www.wallheaven.com/page_flip.png'/></a>

<div class='msg_block'></div>

</div>

Post Rating Widget for Blogger

0

Posted on : 10:41 AM | By : sriram | In : ,

The Simple steps given below will
install this beautiful widget easily.Below is the screen shot of this
widget


How to implement it on blogger/blogspot?

here are the steps;

1. Go to your template editor under your dashboard. Tick the “Expand Widget Template”

2. Find this code

<data:post.body/>

3. Put the codes below right after that line above (or download it here),


<script language='JavaScript'>
var OutbrainPermaLink='<data:post.url/>';
var OB_demoMode = false;
var OB_Script = true;
</script>
<script src='http://widgets.outbrain.com/OutbrainRater.js' type='text/javascript'/>


4. Save your template, and done!

Please be creative. you can move the code as long it still inside the include=’post’ under the blog widget.

If you have problem installing this widget then just log on to - Outbrain.com

Design Float - Widget For Blogger

0

Posted on : 10:37 AM | By : sriram | In : ,

DesignFloat.com is to share stories about Web Design,

CSS, Identity and Branding, Digital art and Illustration. This tutorial
explains how to add a
Float it! button on each post on your Blogger template.


Edit your Blogger template and check "Expand Widget Models". Find this line of code:

<'post-footer-line post-footer-line-3'>

...and paste, below this line, this code

<script type="text/javascript">submit_url = '<data:post.url/>';</script>
<script type="text/javascript" src="http://www.designfloat.com/evb/button.php"></script>

The result looks like this

If you prefer a big button copy and paste this button instead of the first code:

<script type="text/javascript">submit_url ='<data:post.url/>';</script>
<script type="text/javascript" src="http://www.designfloat.com/evb2/button.php"></script>

The result is like this

Save your template and post your stories on Design Float!

How to add Favicon to blogger(blogspot) blog

0

Posted on : 10:26 AM | By : sriram | In :

For those who don't know what Favicon is 'Favicon is a small icon(image) displayed at the beginning of the address bar of the browser.It is also called Favourite Icon,Pageicon and urlicon.

The main advantage of creating and using favicon is ,it makes it easy to find your blog or site when someone favourited or bookmarked your site/blog among several other sites.


favicon Most of the people use 16*16 pixel favicon(you can also use 32*32 pixel favicon) with ".ico" format.But,you can also use gif,png(image formats) aswell.

So,ready to create a favicon?
All you need is a program to create a favicon in (.ico) format.If you haven't a program to create in .ico format,No Problem....you can also use png or gif format.If you have Photoshop, or any other programs like that,open it and create a 16*16 image and save it as .png or gif format [look at the below screenshot below] or there are so many online sites which can create a favicon for you,just search by typing'free online 16*16 icon generator' in google.They ask you to upload a picture from your desktop,and they convert it into 16*16 .ico file.

save the image in png format So,Now your icon is ready...You are just a few steps away from creating a beautiful favicon for your site...

Now,go to Google Page Creator
and upload your icon file by clicking on the upload link(look at right side) and browse the file and note down the url of the file by clicking on the file.[see the screenshots below]


note down the url
Now,go to your blogger dashboard>layout>Edit html[look at the below screenshots]


and look for this code(it is at the top the template)


and add the below code just after the above one[as shown in the below screenshot]

<link href='icon file url ' rel='shortcut icon' type='image/vnd.microsoft.icon'/>

and replace the 'icon file url' with the url of your icon file.(like http.......ico)
That's it! Now you can see a beautiful favicon in your blog.

Read more in blogger

0

Posted on : 8:08 AM | By : sriram | In : ,

Before I start, let me share with you why I like to put read more in my posts.

1. Increasing my blog loading speed. Besides setting my blog reading to 2 posts per page, this is useful to boost your blog speed as well.
2. Let my readers choose what post they would like to read. I can't stand reading extremely long post and I know not everyone likes rubbish talk. Let them read if they want by clicking Read More. :)

Adding "Read More" is easy in Wordpress but not in Blogspot. I have followed many guides from different bloggers and I discovered this one really easy and it works. Are you ready for it? Let's go on.

1. Go Layout-> Edit Html and search(CTRL+F) for </head> and add the code below before it.

<style>

<b:if cond='data:blog.pageType == "item"'>

span.fullpost {display:inline;}

<b:else/>

span.fullpost {display:none;}

</b:if>

</style>

2. Expand Widget Templates and Replace the code below with <data:post.body/>


<p><data:post.body/>

<b:if cond='data:blog.pageType != "item"'>

<a expr:href='data:post.url'>(Read more inside ..)</a>

</b:if></p>


3. Go Settings then Formatting then Post Template

Add the below and save.

<span class="fullpost""></span>

For every post you want to add Read More, simply put the rest of the post within the <span class="fullpost""></span> in Edit Html.

how to add social bookmarking icons in blogger

0

Posted on : 7:07 AM | By : sriram | In :

Social Bookmark Links are widely used by bloggers to help their readers share the useful contents to the world! Digg, Technorati, Delicious, Stumble Upon, Facebook etc are widely used online social bookmarking and sharing communities.


Please Note: Before Editing your Template, Save a copy of your current template by clicking 'Download Full Template' in 'Edit HTML' page of the Blogger 'Layout' Window and 'Preview' the changes before Saving.

Go to Blogger Dashboard - click Edit Layout - then click Edit HTML


Select Expand Widget Templates as shown in the image below:

Then Search(Ctrl+F) the code given below in your template:


<div class="post-footer-line post-footer-line-1">


Add the code given below just after the above line:


<!-- Start of social bookmarks -->
<b><i>Share this:</i>
|<a expr:href='&quot;http://digg.com/submit?phase=2&amp;url=&quot; + data:post.url + &quot;&amp;title=&quot; + data:post.title' target='_blank'>Digg</a> |
<a expr:href='&quot;http://twitthis.com/twit?url=&quot; + data:post.url + &quot;&amp;title=&quot; + data:post.title' target='_blank'>Twitter</a> |
<a expr:href='&quot;http://technorati.com/faves?add=&quot; + data:post.url' target='_blank'>Technorati</a> |
<a expr:href='&quot;http://del.icio.us/post?url=&quot; + data:post.url + &quot;&amp;title=&quot; + data:post.title' target='_blank'>Del.icio.us</a> |
<a expr:href='&quot;http://www.stumbleupon.com/submit?url=&quot; + data:post.url + &quot;&amp;title=&quot; + data:post.title' target='_blank'>StumbleUpon</a> |
<a expr:href='&quot;http://www.facebook.com/share.php?u=&quot; + data:post.url + &quot;&amp;title=&quot; + data:post.title' target='_blank'>Facebook</a> |
</b>
<!-- End of social bookmarks -->


Finally, Save the Template. Finished!


You will see Social Bookmark Links as shown in the image below. Drop Comments!

How to add HTML codes in Blogger Posts?

0

Posted on : 6:47 AM | By : sriram | In :

Recently, one my blog readers wanted to know how do I add Java scripts and other HTML codes in my blog posts. To be very frank, even I had this question when I started my blog initially. And when I tried to implement such tricks in my blog, I faced a lot of difficulties with the coding. But nowadays, I find many sites have come up with blogging tips and it has become very simple to customize your blog. Let me straight away tell you, how to implement this trick on your blog posts.


If you just want to show up HTML codes in your blogger post, that is without any customization, then use this site : Simple Code. This method will show the HTML as it is and looks very simple. If you want to customize the way it is displayed, like I do in my blog, then you should follow the next method. In this method, you will have to include some codings and then your job will be done.

Follow these simple steps to include the HTML/Java script codes in your blog post:
1. Navigate to "Layout>>Edit HTML" from your dashboard. Make a back up of your template before you do any changes in the template.

2. Now, do a search using "CTRL+F" for the following line: ]]></b:skin>
(Note: I have used the first method here. Just to show you how it looks)
3.(Note: I have used the first method here. Just to show you how it looks)
3. Once you find the code, paste the following piece of code above it:


.codeview {
margin : 15px 35px 15px 15px;
padding : 10px;
clear : both;
list-style-type : none;
background : #f9f9f9 url(http://img17.imageshack.us/img17/5162/codeview.gif) no-repeat right bottom;
border-top : 1px solid #eeeeee;
border-right : 2px solid #cccccc;
border-bottom : 2px solid #cccccc;
border-left : 1px solid #eeeeee;
}
.codeview li {
font-size : 13px;
line-height : 24px;
font-family : "Courier New", "MS Sans Serif", sans-serif, serif;
color : #FFFFFF;
font-weight : normal;
margin : 0;
padding : 0;
}


4. Once you do this step, save your template and return to your blog post where you want to insert the HTML code. Place the HTML content in between the following two tags namely,
<div class="codeview"> and </div>.
5. You can include the code straight away in the "Compose Mode" of your blog post area. After you complete your post, you can simply click the button "PUBLISH POST" and later, view the result.

If you still find problems with the display of HTML codes, then use Simple Code and get the simplified code from that site. Now, place this simplified code in between the two tags as mentioned in step four. That's all folks. Hope I made it simple and clear. Please post your views below through comments

Why Blog?

0

Posted on : 12:47 PM | By : sriram | In : , ,

It seems everyone these days is talking about blogging. Everywhere I go, I find articles and forums devoted to this craze. I also have heard from many moms who are trying to figure out what a blog is and how they can use one to their benefit.

The term “blog” is short for “weblog”, which just means an online journal or “log”. You can jot down personal thoughts and notes, post articles you’ve written or keep track of interesting websites you find. The sky is the limit, it seems, when it comes to blogging. A blog is something entirely of your own creation and you can use it to share your thoughts with the world, well….with anyone you can get to read it anyway.

One of the main debates going on about blogs is whether blogging can be done to improve Search Engine rankings for businesses or to create a buzz about business websites. Both of these can be true if the blog is used correctly. Many resources show that once a blog is created, many times it is listed in Search Engines within 48 hours. This was true of the blog I created for Christian Work at Home Moms.

These are many ways to create a blog. The easiest by far is to use one of the free tools available online, such as Google’s Blogger. You can create your blog for free using their online tools and templates(nothing to download). After you have created the blog, you can then publish your blog through them and “Wa-La” – your blog is posted online for the world to see.

Once you’ve created your blog, you will need to decide how you will use it. Will it be a personal blog, full of thoughts and comments for yourself alone or maybe your family? Or will it be a business blog, with articles and tips for potential customers? If you want your blog to be found by others, blogging experts recommend that you begin by setting the title and descriptions for your blog. These are similar to the the title and descriptions you set for your website. Try to make them meaningful because they are what people will see when your blog is returned in a Search Engine. If your description is simply “my blog”, you may not draw the attention you’d like.

If you are blogging in the hopes of attracting customers, make sure to use wise use of words and links in your blogs. Try to avoid the “click here” link. Instead, opt for links within descriptive sentences. Add the HTML link within the sentence and attach it to the words that are closely related to the page or site you are linking to. For example, to link to my website I would not use “click here” as my link. I would say, “Please visit Christian Work at Home Moms for home-based work resources” with the link within the text.

There are many ways to get your blog noticed outside of optimizing them for Search Engines. For instance, there are entire websites devoted to listing blogs dedicated to any topic that you can think of. One of the best such websites devoted to women-created blogs, is BlogDaisy.com. You can also use free tools such a FeedBurner.com to track the traffic on your blog and to create a dynamic title box that can be used to display your blog headlines on your website or even in your email signature. Each time you update your blog, these headlines are instantly updated.

There are many ways to use a blog for either personal or business use. If used correctly, a blog can be a terrific tool to inform potential customers of your business. Be sure to update your blog at least once a week so that the content remains fresh and you remain in the Search Engines.

The 3 Best Website Traffic Sources

0

Posted on : 12:43 PM | By : sriram | In : , ,

Not a day goes by that any serious website owner doesn't wonder how to get more traffic to their site.

This intense desire to generate more clicks makes virtually any online entrepreneur easy prey to many of the traffic schemes and scams that pervade the Internet like conmen on a carnival midway.

Promises of fast traffic and big bucks often separate even the most savvy business person from their money because they want to believe the promises made by these traffic hucksters.

However, rather than thinking "complicated equals better" in the traffic game, the best website traffic sources rate extremely easy to separate from the useless garbage traffic.

Fact: "Good Traffic" equals "Targeted Traffic!"

That means the visitors come as a result of desire to find out more on a specific, niche topic, not as a result of "exit" traffic or membership in a "safe" list where members simply pitch each other in an incestuous spam fest.

Good traffic comes from people clicking links on topics targeted to their interests and getting directed to a website containing information they want and expect as a result of clicking the link.

Bottom line, when you get right down to it, the best, most dependable sources of targeted traffic come from links that people click.

So, next time you're considering spending money on a traffic source, understand that unless it involves a targeted link that a targeted visitor can click to get to your website, think twice before opening up your wallet.

To my knowledge, only three ways exist to get a link to your site: buy it, "voodoo" it, or grow it.

** Buy Links**

Buying links actually rates the fastest way to get traffic to your website.

You simply sign up for Google AdWords at Google.com or you open an account with Overture.com.

You then run ads with a link on those sites and any time someone clicks the link, you pay for the click through a relatively straightforward bidding process based on the popularity of the keyword.

You can also buy links in ezines, newsletters, and on other people's website either on a per-click basis, for a period of time (a week or month), or in exchange for paying them a commission if a sale gets made as a result of a click on the link.

** Linking "VoodDoo" **

Linking "voodoo" refers to attempting to manipulate the search engines into displaying links to your website.

You can find a large number of automated software programs online at any given time that will claim to help you get more search engine traffic.

Depending on the intensity of competition in a specific market and the fact that search engines change their rules frequently, pursuing search engine links this way can quickly turn into the online equivalent of Alice chasing the rabbit down the hole.


** Grow Links **

I personally prefer this method to get links to my websites: growing them.

The best type of link to get involves one person telling another person, either explicitly or implicitly, they should click the link and visit the site at the other end.

One way to do this is simply to exchange links with another site which targets the same audience as your site.

You can manage this process manually or use one of the many software packages that will mange the process for you.

A search on Google.com for "reciprocal link manager software" yields a good start.

The easiest way to grow a link is through using articles other people post on their websites which link back to your website.

The reason articles work so well for "growing" links involves the numerous ways in which articles get distributed online, each of which can create dozens, hundreds, even thousands of different links back to your website by publishing a single article.

In fact, the following represent only the tip of the iceberg when it comes to all the places you can grow links by publishing articles online.

~ Blogs - Your articles can not only appear on your own blog, but get posted by others on their blogs with surprising ease.

The links in these articles can point directly back to your website.

~ Article Directories - Article directories such as IdeaMarketers.com abound online.

They not only provide an easy way to display your articles to allow others to pick them up for posting on their websites, but also in and of themselves attract readers searching for content.

~ OPS (Other People's Sites) - Popular websites like WebProNews.com attract repeat visitors by offering targeted content to their readers.

Since they can't produce all the content themselves, they publish articles created by others. Links from these sites can bring a steady stream of targeted visitors by giving you targeted exposure.

~ Ezines - By getting your articles published in other people's ezines, you can get a link on the most valuable real estate online, a targeted prospect's email "inbox."

Many ezine publishers run articles written by others to their targeted readers, and your link in the resource box can bring you a veritable avalanche of targeted site visitors when hundreds, even thousands of people receive your article at the same time.

Whether you choose to buy them, "voodoo" them, or grow them, getting targeted links to your site posted on the Internet represents the absolute best way to get steady traffic to your site.

Though not as fast as buying them or as exciting as trying to manipulate the search engines, growing links with articles gives you a long-term, dependable presence online.